Hello and Welcome to -
The Intermediate Block of the Month
"Wanderlust"
Pack your bags, grab your passports,
We're going to be visiting 12 amazing landmarks across the globe - and once we're done, we will have 12 fantastic blocks that can be made into a quilt. Each block will be a larger size - 18" (46cm) because some of these places have such tiny details that make up the whole thing and we need to capture it all....
Make some or make all - its up to you...
SO, boarding passes in hand, get to your seat, buckle up and lets get going!!
Our first stop is London
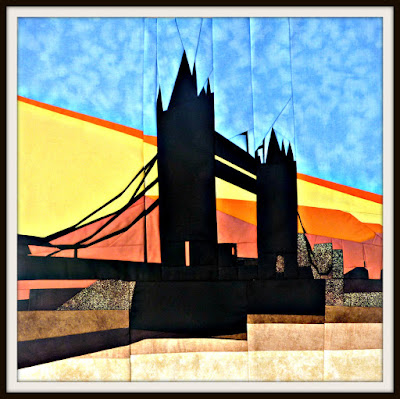
Its sunset, and we're looking at the Tower Bridge

The software I use (QA) can only give me the image using solid fabric colours, to this is the design in its plain clothes...
The other is the design using EQ and a few interesting fabrics added.
The clouds are the darker orange and the river is in the foreground with shadows etc...
I had no time to make the block myself, so I asked my good friend Jan from Sew Surprising at the absolute last minute if she could help me....
This is her amazing block of Tower Bridge and a few helpful tips when sewing the block together too.
The first block is rather easy if you take it slowly, one of the things with paper piecing are the bulky seams, this is something that really bugs me and try as I might finding a solution that works well enough has alluded me, till the other week. I had read on Pintrest a suggestion a lady had explained (sorry I cant recall who the credit goes too for this) how she presses her quilt blocks and lays a ruler on them to achieve flat seams, this got me thinking, if it works for simple quilt blocks it might work for paper piecing.
All I needed was a solid surface, a new cheese board still in the wrapper suddenly had a new purpose, I covered it in a pillowcase, then I hunted around for something really heavy, a big cut piece of crystal fitted the bill, also I am a big 'starcher', I use Iron Easy which is a starch product you make up yourself and its just great in my humble view. So what I did was especially on the sections with the suspension parts of the block, I assembled the sections as per the pattern, I had also poured my liquid starch into a small cup and found a small paint brush just a kids one is fine, and painted the seam with a generous amount of starch, then with a pressing cloth over it I sat the iron on it, my iron is heavy but I did add a bit more pressure, as soon as I removed the iron I placed the cut crystal on top and let it sit till it cooled, and then one more press if it wasn't as flat as I had wanted I repeated the process, it did make a big difference and I even just sprayed the starch a few times onto the seams when the pieces were becoming bigger, it also helped when it came to removing paper but both ways worked well, a personal preference thing.
The other little tip I found that made the process a lot quicker, as I am making my pieces I lay them fabric side down on the biggest square ruler I have, sounds silly but by doing this I don't have to flip pieces backwards and forwards to see how it looks colour wise etc, all I do is hold the ruler up over my head and I can see the progress, and when it comes to assembling I'm good to go, I really was surprise with how this saved time and kicked myself I never thought of it sooner.
*************
Thanks so much Jan, you're my hero!
The BOM information is in the button to the right of the blog where you can also find the BOM buttons if you would like to spread the word. Thanks


0 Response to "Intermediate Block of the Month 2016"
Post a Comment